 Save to Pinterest
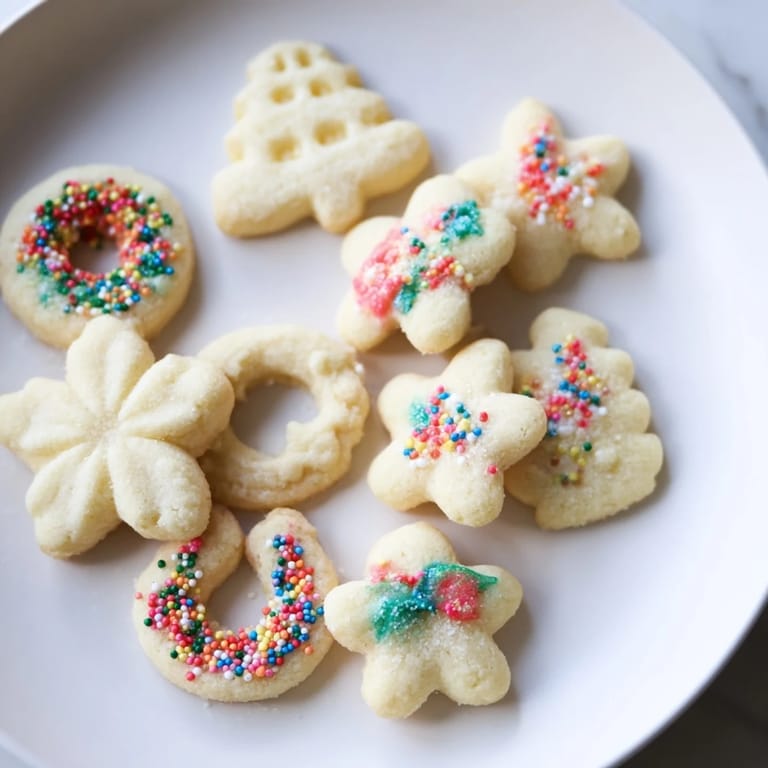
 My grandmother kept her cookie press in a special drawer, wrapped in tissue paper like it was made of spun glass. One December afternoon, she showed me how the dough had to be just soft enough to flow through the metal disc, and I watched the butter and sugar transform into delicate wreaths and stars on her worn baking sheets. Those spritz cookies became my standard for what a holiday should taste like—buttery, crisp, and somehow both simple and celebratory at once.
I made these for a potluck once and someone asked if I'd bought them from a bakery. The question stung a little until I realized it was a compliment—they looked too refined to be homemade. That's when I understood the real magic of a cookie press isn't just efficiency; it's how it transforms a soft, unremarkable dough into something that looks like it required years of training.
Ingredients
- Unsalted butter, softened: Room temperature is non-negotiable here because cold butter won't cream properly, and warm butter turns greasy; this dough needs to be whipped into cloud-like submission.
- Granulated sugar: This sweetness is straightforward and lets the vanilla and butter be the stars.
- Large egg: Make sure it's been sitting on the counter long enough to warm up, or the dough will seize and refuse to cooperate with your cookie press.
- Pure vanilla extract: Don't use imitation if you can help it; the difference shows in flavor and fragrance.
- Almond extract (optional): A half-teaspoon adds a subtle sophistication that makes people pause before they eat the second cookie.
- All-purpose flour: Measure by weight if you can, or spoon and level carefully; too much flour makes the dough stiff and stubborn.
- Fine salt: A small pinch brings all the sweetness into focus without announcing itself.
Tired of Takeout? 🥡
Get 10 meals you can make faster than delivery arrives. Seriously.
One email. No spam. Unsubscribe anytime.
Instructions
- Set your stage:
- Preheat the oven to 350°F and line your baking sheets with parchment paper or use nonstick surfaces. This minute of preparation prevents frantic scrambling later.
- Build your foundation:
- Cream the butter and sugar together for 2 to 3 minutes using an electric mixer on medium speed until the mixture looks pale and fluffy, almost mousse-like. This incorporates air that makes the cookies tender rather than dense.
- Add character:
- With the mixer running, pour in the room-temperature egg and extracts, scraping down the bowl to catch any streaks of egg white. The mixture should look smooth and slightly glossy.
- Bring it together gently:
- On low speed, gradually add the flour and salt, mixing just until a soft dough forms. Overmixing develops gluten, which will make your cookies tough instead of delicate. Stop the moment you don't see dry flour anymore.
- Fill and press:
- Pack the cookie press with dough according to the manufacturer's instructions, then press cookies directly onto the prepared sheets about an inch apart. The dough should flow smoothly; if it's stiff or breaks apart, it wasn't soft enough.
- Adorn if you wish:
- Sprinkle with colored sugar or press a single piece of sprinkle into the top of each cookie before baking. Chocolate and decoration come later if you choose.
- Bake with attention:
- Bake for 7 to 9 minutes, watching for the moment when the edges just barely turn golden—the centers should still look pale and soft. Every oven runs differently, so start checking at 7 minutes.
- Cool with patience:
- Let cookies sit on the baking sheet for 2 minutes to firm up slightly, then transfer to a wire rack. This prevents them from breaking while they're still too fragile.
- Finish if desired:
- Once completely cooled, drizzle melted chocolate over the tops for elegance and flavor.
 Save to Pinterest
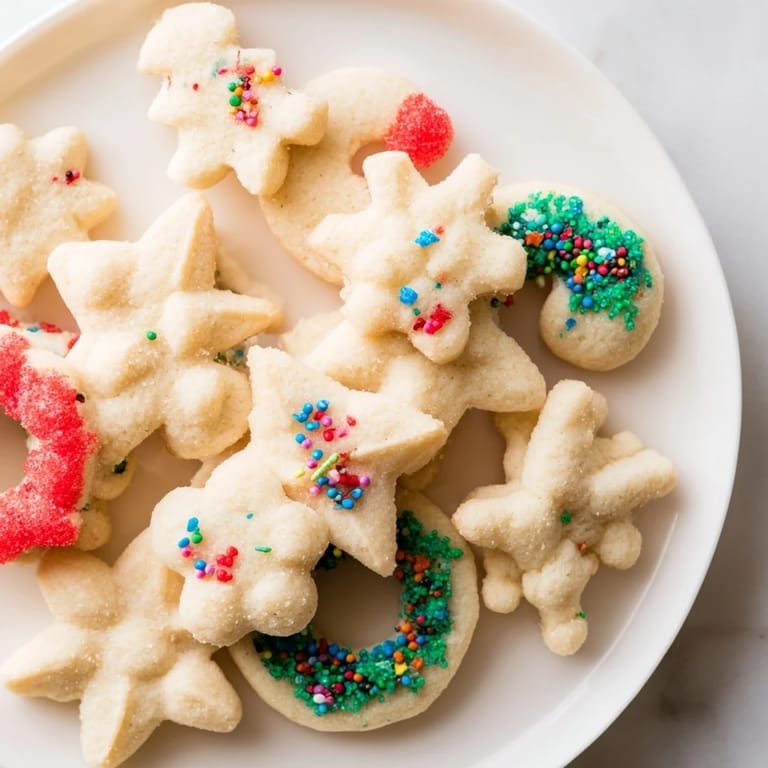
 My daughter once decorated a batch with so much colored sugar that they looked like tiny mosaics. Some fell off in the oven and caramelized on the baking sheet, creating an accidental mess that somehow tasted better than the picture-perfect ones. That's when I learned that spritz cookies are forgiving enough to enjoy even when things don't go exactly as planned.
The Cookie Press Question
A cookie press is worth the drawer space if you plan to make these more than once. There are vintage metal ones that work beautifully, plastic ones that are lightweight and easy to clean, and even battery-operated versions that do the work for you. The metal discs allow you to create stars, wreaths, fluted rings, or simple rosettes. Pick whichever feels right in your hand, because you'll be holding it for a while, and comfort matters.
Flavor Variations
Vanilla and almond are classic, but spritz cookies are a canvas waiting for your imagination. Lemon zest brightens the dough and makes them feel spring-like, while orange zest adds warmth. I've added a pinch of cardamom and it transformed the whole batch into something that tasted almost Scandinavian. You could even steep a little brewed tea or strong coffee into the butter to create something earthier. The flour quantity stays the same; just make sure your additions don't add moisture that would change the dough consistency.
Storage and Keeping
These cookies stay fresh in an airtight container at room temperature for up to a week, though they're rarely around that long. I've kept them in the freezer for up to two months, and they thaw in minutes without any loss of flavor or texture. The chocolate decoration can become sticky in warmth, so keep decorated cookies separate from cookies you plan to refrigerate.
- Store plain and decorated cookies in separate containers so the moisture from chocolate doesn't soften the simple ones.
- If cookies soften from humidity, recrisp them in a 300°F oven for 5 minutes, then cool completely.
- A single sugar cookie of any kind in the container keeps the others from drying out, acting like an edible humidity regulator.
 Save to Pinterest
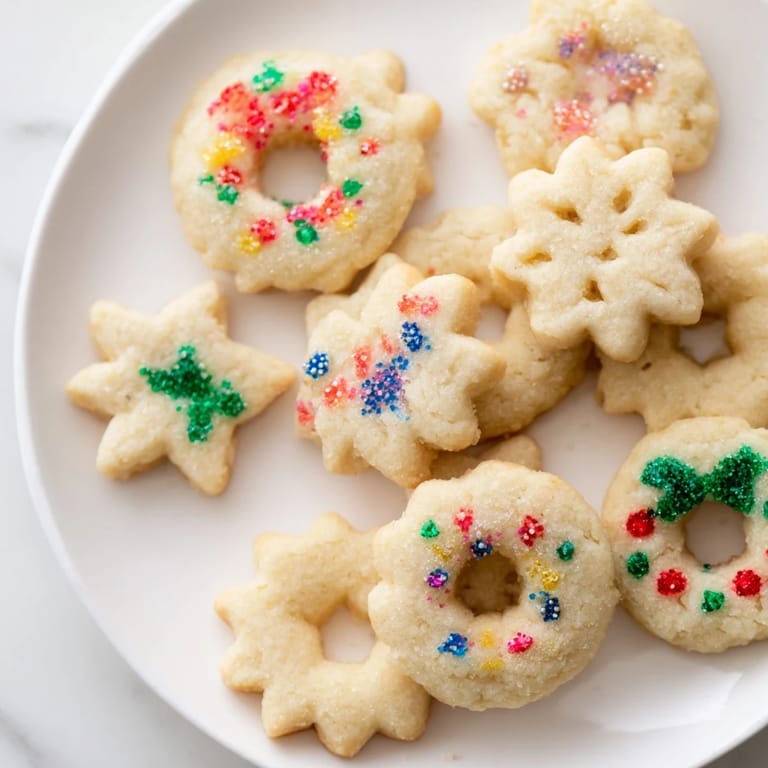
 These cookies are simple enough to make on an ordinary Tuesday but elegant enough to wrap up as gifts. They're the kind of thing that feels like a small piece of care, pressed into shape one at a time.
Recipe FAQs
- → What is the best butter temperature for mixing?
Use softened butter at room temperature to ensure smooth creaming with sugar for a light, fluffy dough.
- → Can I substitute almond extract?
Yes, lemon or orange zest can provide a different but complementary flavor in place of almond extract.
- → How do I prevent cookies from sticking to the press?
Keep the dough soft and avoid chilling; this helps the dough flow easily through the cookie press without sticking.
- → What decorations work well with these cookies?
Colored sanding sugar, sprinkles, or a drizzle of melted chocolate add festive appeal and contrast to the buttery base.
- → How should these cookies be stored?
Store in an airtight container at room temperature for up to one week to maintain freshness and texture.