 Save to Pinterest
 There's something about the smell of hot oil and butter that instantly transports me to a small pâtisserie tucked away on a rainy Paris afternoon. I was watching the pastry chef pipe these delicate twists when one landed in the fryer with the most satisfying sizzle, puffing up like a golden cloud within seconds. That moment of transformation—from a quiet coil of dough to something ethereal and crispy—stayed with me, and I've been chasing that magic in my own kitchen ever since. These French crullers are proof that the simplest ingredients, treated with a little patience and care, become something truly extraordinary.
I made these for my friend Sarah on her birthday morning, and watching her take that first bite—eyes widening as she discovered the airy pocket inside—reminded me why I love cooking for people. The crullers were still warm, the glaze hadn't fully set, and somehow that imperfection made them feel more like a gift than a dessert. She dunked hers in her coffee without hesitation, and we both laughed at how the glaze started melting instantly.
Ingredients
- Water: Room temperature is your friend here; cold water will shock the butter and ruin the emulsion you're building.
- Unsalted butter: Cut into small pieces so it melts quickly and evenly, distributing throughout the dough.
- Granulated sugar: This is added to the water before the flour—it helps create structure and a subtle sweetness that balances the richness.
- Salt: Essential for flavor; don't skip it even though it's just a quarter teaspoon.
- All-purpose flour: Measure by spooning into your cup and leveling off; scooping directly can pack in too much flour and make your dough heavy.
- Room-temperature eggs: This matters more than you might think—cold eggs shock the warm dough and can cause it to break down or become lumpy.
- Vanilla extract: Adds a whisper of flavor that lets everything else shine.
- Powdered sugar: Sift it before mixing into the glaze to eliminate lumps and ensure a silky coating.
- Milk or water for glaze: Use whichever you prefer; milk creates a slightly richer glaze, while water keeps it pure and bright.
- Neutral oil: Canola, sunflower, or vegetable oil all work beautifully; avoid anything with a strong flavor that might overpower the delicate cruller.
Tired of Takeout? 🥡
Get 10 meals you can make faster than delivery arrives. Seriously.
One email. No spam. Unsubscribe anytime.
Instructions
- Build your base:
- In a medium saucepan, combine water, butter, sugar, and salt. Bring to a boil over medium heat, stirring occasionally until the butter melts completely and the mixture looks glossy and unified.
- Add the flour:
- Pour in all the flour at once, then stir vigorously with a wooden spoon for about 2 minutes until the mixture forms a tight ball and pulls cleanly away from the sides of the pan. You'll feel the dough transform from shaggy to cohesive.
- Cool slightly:
- Remove from heat and let the dough rest for 3 to 5 minutes; this cooling period allows the gluten to relax and makes adding eggs much easier.
- Incorporate the eggs:
- Add one egg at a time, beating well after each addition until it's fully incorporated and the dough is smooth and glossy again before adding the next. The dough will look lumpy and separated after each egg, but keep beating—it will come together beautifully.
- Final flavor:
- Stir in the vanilla extract until just combined; you now have a thick, pipeable dough that should be glossy and fall gently from a spoon.
- Pipe and shape:
- Transfer the dough to a piping bag fitted with a large star tip. Cut 12 squares of parchment paper (about 3 by 3 inches), then pipe a 3-inch twisted ring of dough onto each square—the star tip creates those beautiful ridges naturally.
- Heat your oil:
- In a heavy-bottomed pot or deep fryer, heat oil to 350°F (175°C); use a thermometer to get this right, as temperature is crucial for crullers.
- First fry:
- Carefully place 2 to 3 parchment-topped crullers into the oil, parchment side down. After 1 to 2 minutes, the cruller will puff and float—this is when you gently remove the parchment with tongs.
- Finish frying:
- Continue frying the now-naked crullers for another 2 to 3 minutes per side, turning once, until they're deep golden brown and puffed throughout.
- Drain and cool:
- Remove crullers with a slotted spoon and place them on a cooling rack or paper towels; this allows air to circulate underneath and keeps them crisp.
- Make the glaze:
- In a bowl, whisk powdered sugar, milk, and vanilla until perfectly smooth with no lumps; the consistency should be pourable but thick enough to coat.
- Glaze while warm:
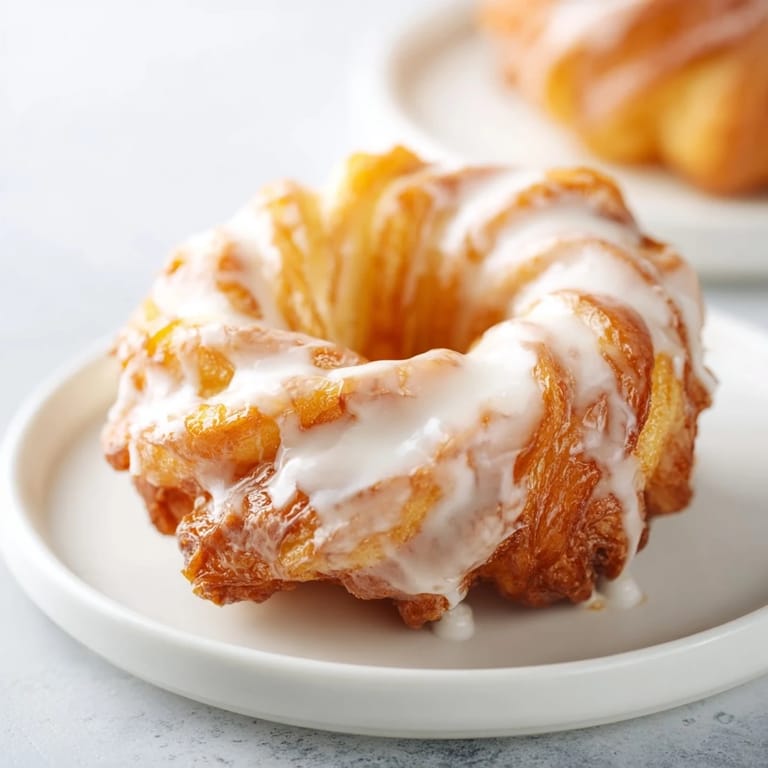
- Dip each warm cruller into the glaze, letting the excess drip off, then place it back on the rack to set. The warm cruller helps the glaze adhere beautifully.
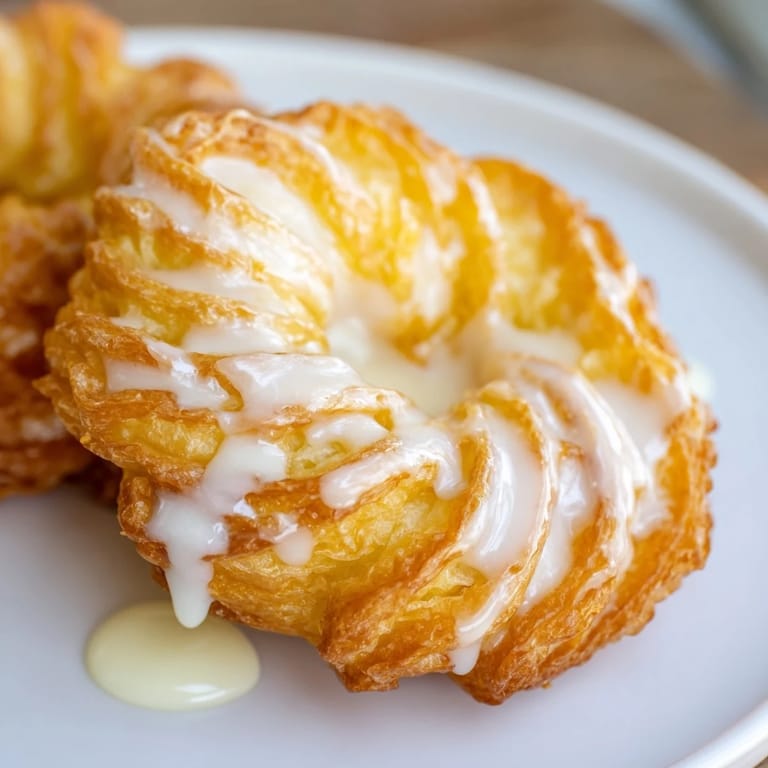 Save to Pinterest
 I once made crullers for a small morning gathering and got so distracted chatting that I let the oil temperature drop without realizing it. The result was something between a cruller and a dense donut—edible, but missing that magical crispy-airy contrast. That mistake taught me to stay present and check my thermometer every few crullers, and now each batch turns out perfect. The best lessons in the kitchen often come from things going slightly wrong.
The Choux Pastry Magic
Choux pastry is one of those kitchen wonders that seems intimidating until you understand what's happening: you're creating steam pockets by adding moisture (eggs) to a butter-flour mixture, and those steam pockets are what makes crullers puff up spectacularly when fried. The key is beating each egg in thoroughly so the dough stays cohesive and glossy rather than breaking down. Once you nail choux, you unlock profiteroles, éclairs, and cream puffs too.
Variations and Twists
While the classic glaze is perfect on its own, I've had fun experimenting with additions over time. A tiny touch of lemon or orange zest in the glaze brings brightness that feels less heavy, while a whisper of cinnamon sugar sprinkled on the warm, unglazed cruller creates a more rustic charm. Some days I'll drizzle a thin chocolate glaze instead, letting it set into thin, snappy shards.
Storage and Enjoyment
Crullers are absolutely best the day they're made, when the exterior is still crisp and the interior tender. If you do have leftovers—which rarely happens—store them in an airtight container, and they'll hold reasonably well for a day or two, though they'll soften slightly. The perfect pairing is still a steaming cup of strong coffee or black tea, the way I first experienced them in Paris.
- Make the dough ahead if you want: refrigerate it for up to 2 hours, then bring it back to room temperature before piping.
- If you're nervous about the oil temperature, invest in a simple clip-on thermometer—it takes the guesswork out completely.
- These freeze beautifully before frying, so pipe, freeze on the parchment, then pop them straight into hot oil from frozen.
 Save to Pinterest
 These crullers remind me that the most satisfying moments in cooking often involve simple transformations: butter and flour becoming clouds of pastry, oil bubbling with warmth and possibility. There's something quietly magical about that.
Recipe FAQs
- → What makes French crullers different from other donuts?
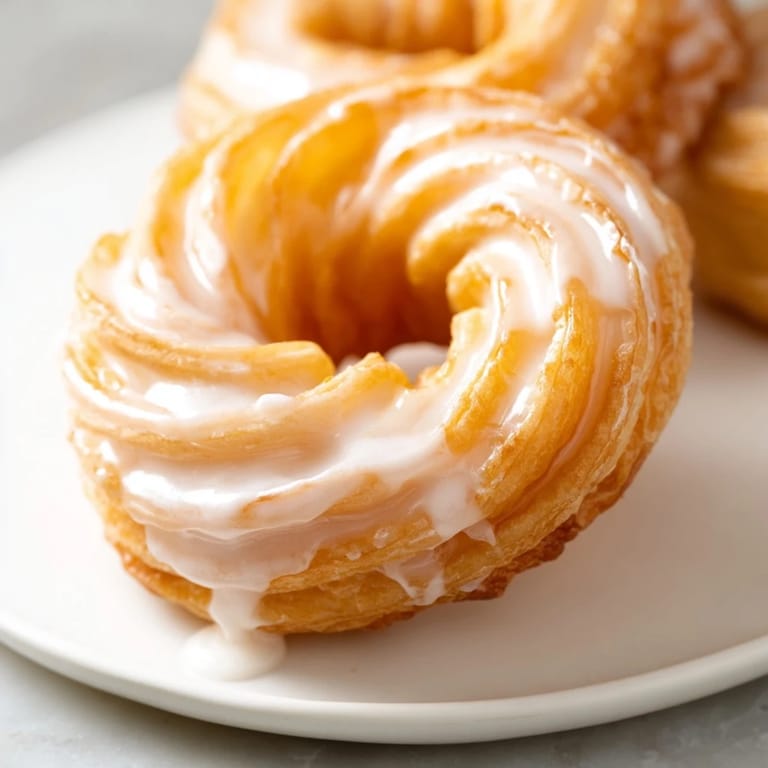
French crullers use choux pastry, which puffs up during frying to create a light and airy texture with a crisp exterior, unlike yeast- or cake-based donuts.
- → How do you achieve the twisted shape in crullers?
The dough is piped into rings using a star tip nozzle, creating ridges. Forming twisted circles before frying gives crullers their signature shape.
- → Can these be baked instead of fried?
Yes, baked crullers produce a less crisp texture but still offer a tender interior. Bake at 400°F (200°C) for 20–25 minutes until golden.
- → What oil is best for frying crullers?
Neutral oils like canola, sunflower, or vegetable oil work best for deep-frying to maintain a clean flavor and crisp finish.
- → How should crullers be stored for freshness?
Store crullers at room temperature in an airtight container for up to one day to maintain crispness and softness.
- → Can I add flavors to the glaze?
Yes, adding finely grated lemon or orange zest to the glaze gives a bright citrus note that complements the sweetness.