 Save to Pinterest
 As soon as a hint of spring wafted in through my kitchen window, I felt compelled to try something glamorous and playful for a friend’s bridal shower. The rosé velvet cake idea started as a bit of a dare: could a bottle of crisp pink wine truly make a cake taste as alluring as it looked? I discovered that not only could it, but with a sprinkle of edible gold shimmer, the cake became an instant centerpiece. The subtle sparkle caught the sunlight, and the scent of sweet berries in the rosé mingled so perfectly with the buttery crumb. I’d never seen people hover so anxiously near the dessert table before.
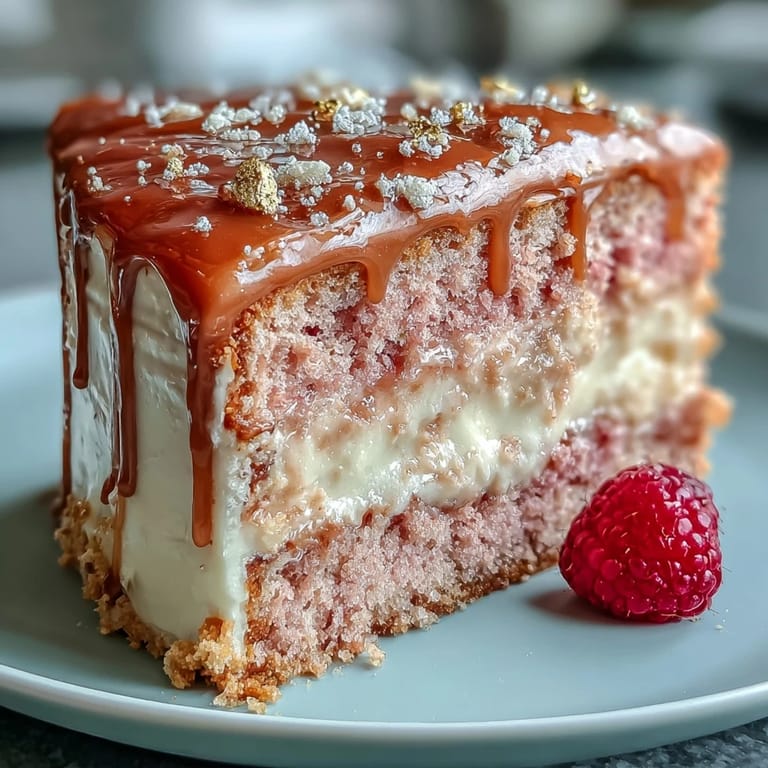
When I made this cake for my cousin’s bridal shower, the kitchen filled with laughter and a bit of chaos—there was powdered sugar dust on the cat and gold luster on everyone’s knuckles. I’ll never forget my aunt’s gasp as she watched me paint those glimmering drips on the perfectly pink cake. It felt almost too pretty to slice, but that lasted about forty seconds before we dove in. I think folding the final rose petals on top marked the moment the party truly began. There’s just something about a cake like this that brings out everyone’s sense of occasion.
Ingredients
- All-purpose flour: Use a kitchen scale for accuracy—too much flour can toughen the cake and you want a tender crumb.
- Granulated sugar: Don’t skimp or sub; regular white sugar gives the cleanest color and sweetest balance.
- Baking soda: Make sure it’s fresh—flat soda means flat cake layers.
- Fine salt: Just a pinch wakes up all the flavors but a heavy hand will show (I learned that the hard way).
- Cocoa powder (unsweetened): That little bit makes the color deeper and the flavor rounder.
- Vegetable oil: Oil keeps it moist for days—don’t swap with butter here, as you want that plush texture.
- Eggs, room temperature: Cold eggs won’t whisk in smoothly and can make the batter seize.
- Buttermilk, room temperature: Brings tang and keeps the cake extra soft; as a backup, sour milk works, too.
- Rosé wine: Adds a subtle floral-fruity note and a playful twist—use something you’d actually drink.
- Vanilla extract: Real extract gives warmth; avoid imitation for best flavor.
- White vinegar: This reacts with the soda for a tender, beautifully domed cake.
- Pink or rose gel food coloring: Gel holds the shade without thinning the batter; add a little at a time.
- Unsalted butter, room temperature (buttercream): Beat longer than you think for airiness and a pale, creamy foundation.
- Powdered sugar, sifted (buttercream): Sifting is vital—no one wants sugar lumps in their elegant cake.
- Rosé wine (for buttercream): Just enough for a whisper of flavor without overwhelming the sweetness.
- Vanilla extract (buttercream): Rounds everything out, even if you can’t quite put your finger on it.
- Salt (buttercream): Counterbalances the sugar, so the icing finishes cleanly on the palate.
- White chocolate chips (gold drip): Melt slowly; overheated chocolate seizes easily.
- Heavy cream (gold drip): Softens the white chocolate for that perfect drip effect.
- Edible gold luster dust: Make sure it says ‘edible’ and dust with a light hand for real shimmer.
- Vodka or clear lemon extract (gold drip paint): Vodka evaporates quickly, leaving only the shine; lemon extract adds a subtle zest if you prefer.
Tired of Takeout? 🥡
Get 10 meals you can make faster than delivery arrives. Seriously.
One email. No spam. Unsubscribe anytime.
Instructions
- Preheat and Prepare:
- Set your oven to 350°F (175°C), and line three 8-inch pans with parchment so nothing sticks and your layers come out clean.
- Sift and Combine:
- In a big bowl, sift together your flour, sugar, baking soda, salt, and cocoa, letting the cloud of flour settle before you breathe in that gentle chocolaty aroma.
- Mix Wet Ingredients:
- Whisk together oil, eggs, buttermilk, rosé, vanilla, and vinegar until glossy — it's mesmerizing to see the colors swirl as they come together.
- Create the Batter:
- Pour wet into dry and gently mix just until combined — add food coloring a drop at a time until the pink shade makes you smile.
- Bake the Layers:
- Divide batter equally, smooth the tops, and bake for 30-35 minutes, until your kitchen smells sweet and a toothpick emerges clean.
- Cool Completely:
- Let cakes rest in their pans for 10 minutes, then tip onto a wire rack; patience here ensures your cakes don't collapse.
- Buttercream Magic:
- Cream butter with a mixer until fluffy; then, add powdered sugar cup by cup, forming clouds that slowly settle into creamy peaks.
- Flavor the Frosting:
- Beat in rosé, vanilla, and salt for 2-3 minutes; it should taste just barely boozy and perfectly silky.
- Stack and Crumb Coat:
- Level and stack cake layers with buttercream between; swipe a thin coat around the outside to lock in crumbs and chill for 20 minutes.
- Finish Frosting:
- Add the final layer of buttercream with gentle swoops, feeling that satisfying smoothness under your spatula.
- Prepare the Gold Drip:
- Melt white chocolate chips with cream, cool for 10 minutes, then test a drip on the cake's side before proceeding.
- Paint and Decorate:
- Once drips are set, use your gold luster paint to brush them gilded—it’s impossible not to feel a little fancy doing this. Add petals or berries for that just-picked flourish.
 Save to Pinterest
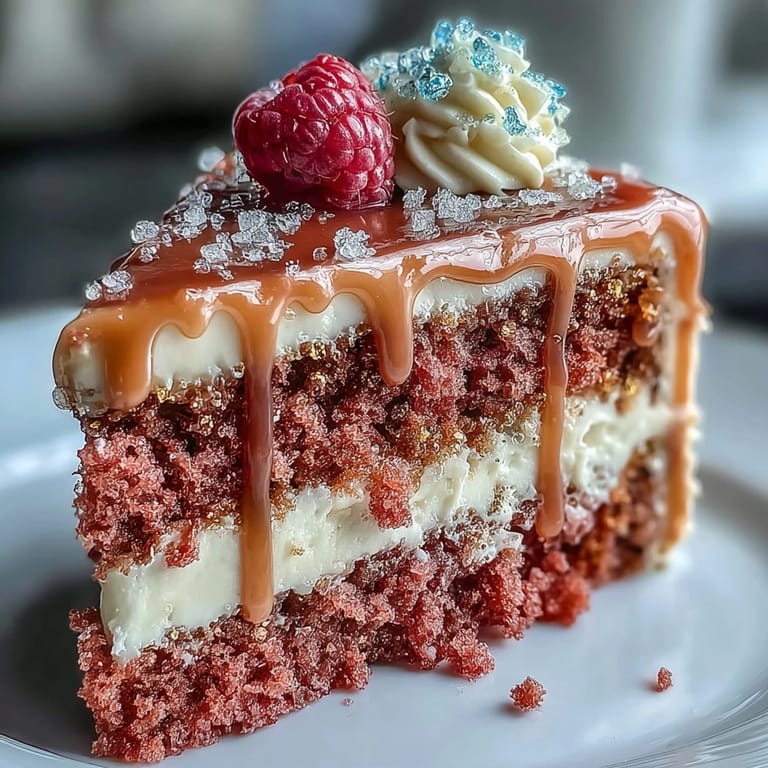
 At my friend’s shower, the room actually hushed for a second when I carried this cake out. I’ve never felt more like a magician than when everyone saw the reveal of shimmering golden drips on that rosy pink, and even now, people mention that cake as the highlight of the whole day.
Decorating Without Stress
I used to worry so much about getting the gold drip perfect, but I realized a few uneven drips just make it look more playful and celebratory. The paintbrush part is genuinely fun—think of it like finger painting for grownups! Let the buttercream set in the fridge before decorating so everything stays crisp and smudge-free. Keep wet paper towels nearby for sticky fingers, and just enjoy the little messes—they’re part of the charm. If you accidentally drip gold down the sides, add strategically placed rose petals to cover up and nobody will know.
Making Ahead Like a Pro
The day I learned this cake actually tastes better the next day was a game-changer. I now bake and frost it on Friday night for Saturday parties, and it always slices cleanly. Just keep it in the fridge, sealed up, and bring it out an hour before serving for the softest crumb. If you want to add the gold drip early, do it after chilling—the drip holds its shape on cool buttercream. Buttercream can be made in advance, too—beat it again briefly before using to restore its fluffiness.
Kitchen Learnings for Next Time
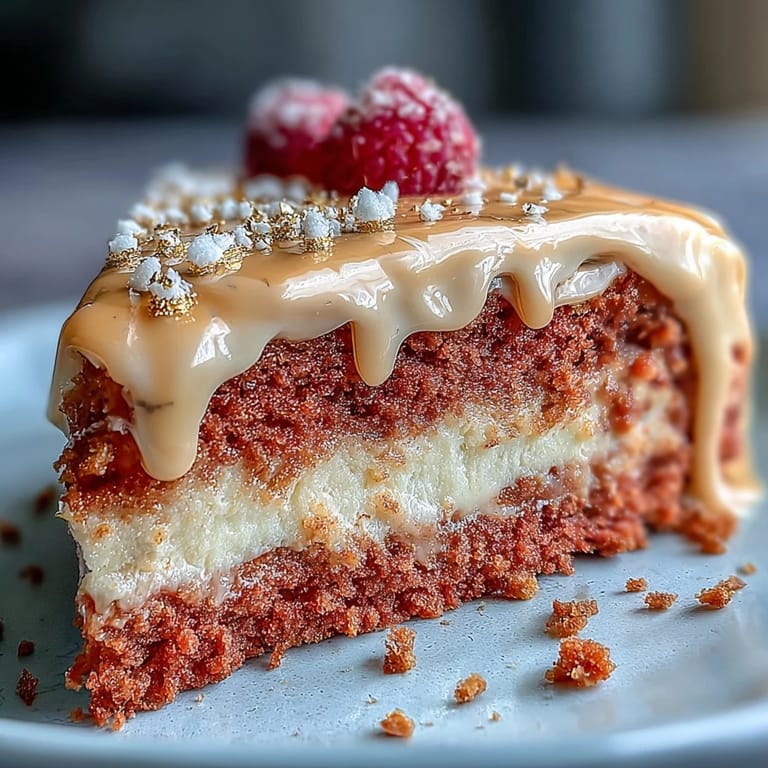
After a few goes, I discovered the cake comes out best when all ingredients are truly room temp—the batter blends more evenly and you get a finer crumb. If your cakes dome too much, just trim with a serrated knife (the offcuts make great snacks while you work). When painting the gold drip, use short dabbing motions so the edible dust doesn't streak. Chilling the cake between steps is your best friend in humid weather.
- Test the drip on a chilled plate before doing the whole cake.
- Be gentle adding food coloring—a little goes a long way for the perfect blush.
- Always read the label on gold luster—it must be edible, not just decorative.
 Save to Pinterest
 I hope this rosé velvet cake brings as much sparkle and laughter to your celebration as it has to mine. May your kitchen be filled with joy—and a little bit of edible gold magic!
Recipe FAQs
- → Can I make this without alcohol?
Yes. Swap the rosé with an equal amount of unsweetened white grape juice, apple juice, or a mild floral syrup for similar flavor and moisture without alcohol.
- → How do I get an even pink color?
Use gel or paste food coloring for vibrant color without thinning the batter. Add a little at a time until you reach the desired rosy-pink shade.
- → How do I prevent a runny gold drip?
Cool the white-chocolate drip until just pourable, test on the side of a chilled cake, and apply sparingly. Chill the cake briefly after a thin crumb coat to help control the drip.
- → Is edible luster dust safe to use?
Use only food-grade, labeled edible luster dust mixed with a food-safe solvent (vodka or clear lemon extract) and avoid non-food metallic products. Follow manufacturer guidance for safe use.
- → How long can the finished cake be stored?
Refrigerate the cake for up to 48 hours; cover loosely to protect decorations. Bring to room temperature for 30–60 minutes before serving for best texture and flavor.
- → Can I prepare components ahead of time?
Yes. Cakes can be baked a day ahead and wrapped tightly. Make buttercream and gold paint in advance; assemble and decorate on the day for optimal finish.