 Save to Pinterest
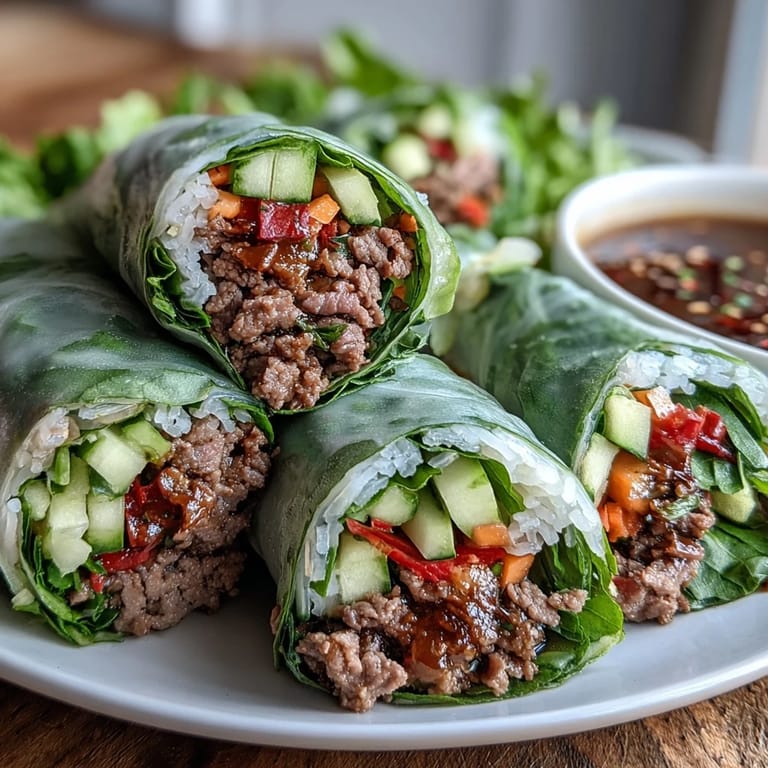
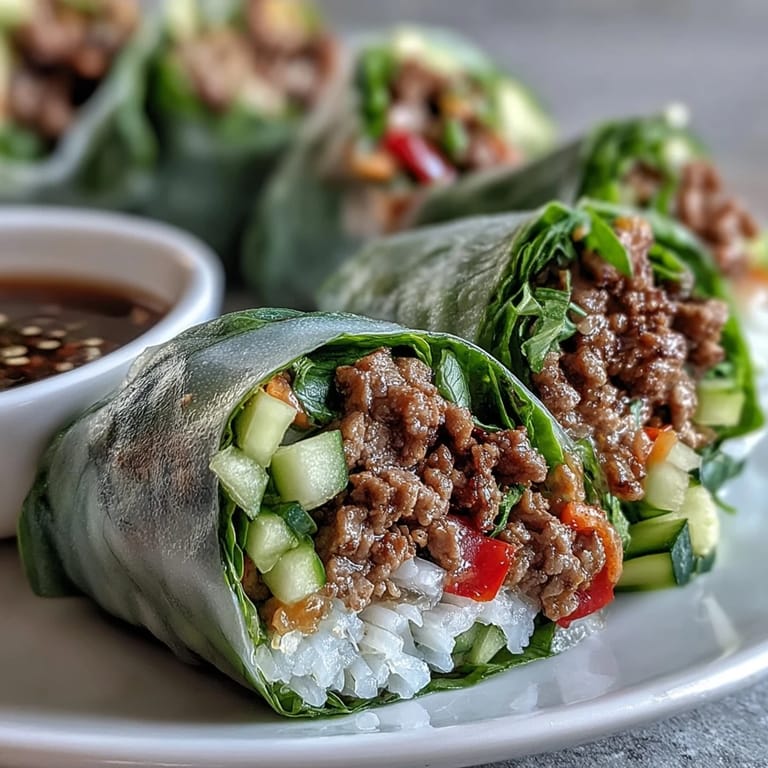
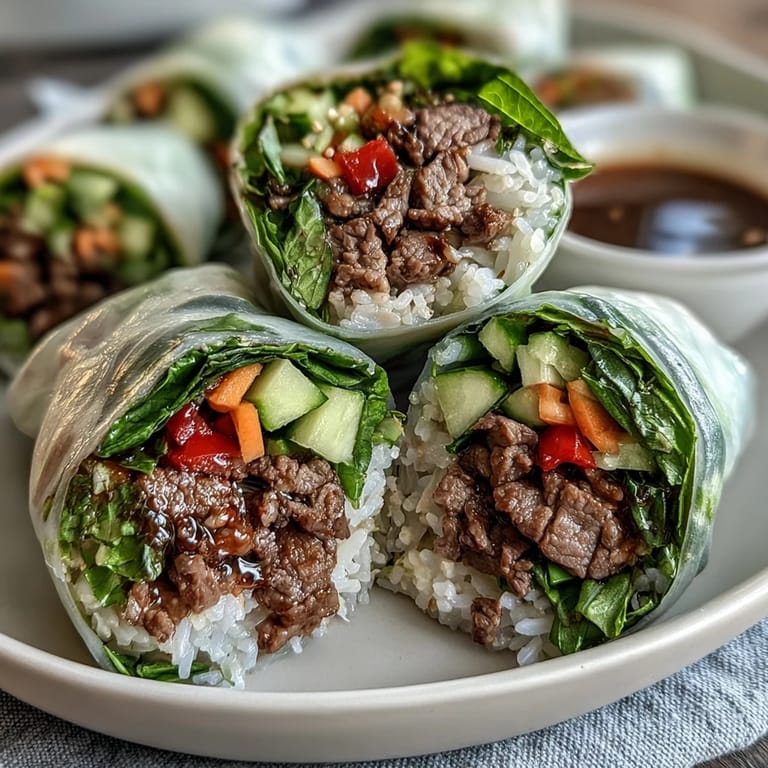
 The smell of Thai basil hitting hot oil always pulls me straight back to a humid Bangkok evening, standing elbow-to-elbow with a street vendor who somehow made magic happen on a two-burner cart. I had no idea what she was making, but the smell alone convinced me to stay. When she handed me a roll stuffed with fragrant beef and cool herbs, I realized I'd been missing this combination my entire life without even knowing it.
I made these for a potluck once and watched a friend who claimed to hate cilantro eat four rolls without realizing it was in there. The herbs blend so naturally with the beef that even skeptics forget their usual complaints. By the end of the night, everyone was hovering around the platter, and I had to promise to send the recipe to at least six people before I could leave.
Ingredients
- Ground beef (85-90% lean): Lean enough to avoid greasiness but fatty enough to stay juicy; drain excess oil if needed after browning.
- Thai basil: The star herb with a slightly spicy, anise-like flavor that Italian basil cannot fully replace, though it works in a pinch.
- Fish sauce: Provides umami depth and saltiness; start with less if you are new to it and taste as you go.
- Rice paper wrappers: Look for the large round ones in the Asian aisle; they turn soft and sticky when dipped in warm water.
- Lime juice: Brightens the beef at the end and balances the richness; always use fresh, never bottled.
- Garlic and shallot: The aromatic base that builds flavor from the first sizzle in the pan.
- Thai birds eye chilies: Tiny but fierce; remove seeds if you want warmth without the burn.
- Fresh herbs (cilantro, mint): Add brightness and coolness that cut through the richness of the beef.
- Cucumber and carrot: Julienne them thin for crunch and sweetness without overpowering the roll.
- Jasmine rice or vermicelli: Optional but helpful for making the rolls more filling and easier to handle.
Tired of Takeout? 🥡
Get 10 meals you can make faster than delivery arrives. Seriously.
One email. No spam. Unsubscribe anytime.
Instructions
- Mix the sauce seasoning:
- Combine soy sauce, fish sauce, oyster sauce, dark soy if using, and sugar in a small bowl, stirring until the sugar dissolves completely. Add water to thin it into a glossy, pourable consistency that will coat the beef without pooling.
- Bloom the aromatics:
- Heat oil in a large skillet over medium-high and add garlic and shallot, stirring constantly for 30 to 45 seconds until golden and fragrant. This step builds the foundation of flavor, so do not let them burn.
- Add heat and green onion whites:
- Toss in minced chilies and the white parts of the green onions, stirring for 20 to 30 seconds. The kitchen will start to smell intense and bright.
- Brown the beef:
- Add ground beef and break it apart with a spatula, cooking for 4 to 6 minutes while stirring frequently. Let it brown in spots for deeper flavor.
- Stir in the bell pepper:
- Add diced red bell pepper and cook for 2 to 3 minutes until it softens slightly but still has a bit of snap. The color will deepen and sweeten as it cooks.
- Glaze with sauce:
- Pour the prepared sauce over the beef and toss to coat, cooking for 2 to 3 minutes until the liquid reduces and clings to the meat. Taste and adjust seasoning if needed.
- Wilt the basil:
- Lower the heat and add chopped Thai basil and green onion greens, tossing for 30 to 45 seconds until the basil just wilts and releases its aroma. Do not overcook or it will lose its brightness.
- Finish with lime:
- Turn off the heat and stir in fresh lime juice, then let the mixture cool to room temperature before rolling. Warm filling will tear the delicate rice paper.
- Prep your fillings:
- While the beef cools, cook and cool your rice or noodles if using, and prep all vegetables and herbs into separate bowls. Lay everything out assembly-line style for easy rolling.
- Make the dipping sauce:
- Whisk together fish sauce, lime juice, sugar, and water until the sugar dissolves, then add garlic, chilies, shredded carrot, and herbs. Taste and adjust for a balance of salty, sour, sweet, and spicy.
- Set up your rolling station:
- Fill a large shallow dish with warm (not hot) water and prepare a clean board or plate, lightly oiled if the wrappers tend to stick. Work near your filling bowls.
- Soften the rice paper:
- Dip one wrapper in warm water for 3 to 5 seconds, rotating to moisten all over, then lay it on your board. It will continue to soften as you fill it.
- Fill and fold:
- Place 2 to 3 tablespoons of rice or noodles on the bottom third, then top with beef, cucumber, carrot, lettuce, and herbs. Fold the bottom edge over the filling, tuck in the sides, and roll tightly away from you.
- Repeat and rest:
- Place each roll seam-side down on a plate and repeat with remaining wrappers and filling. If the wrappers start sticking, lightly oil the plate between rolls.
- Serve immediately or store:
- Leave whole or slice diagonally and serve with dipping sauce. If storing, cover with a damp towel and plastic wrap, refrigerate up to 2 to 3 hours, and let sit at room temperature 10 to 15 minutes before serving.
 Save to Pinterest
 These rolls became my go-to whenever I wanted to feel productive in the kitchen without turning on the oven in summer. There is something satisfying about building each one by hand, seeing the bright layers through the translucent wrapper, and knowing that every bite will taste clean and vibrant. They also make great use of leftover herbs and vegetables that might otherwise wilt in the crisper drawer.
How to Keep Rice Paper from Sticking
The first time I rolled these, I ended up with a pile of torn, sticky wrappers stuck to the cutting board and my hands. The trick is to lightly oil your work surface with a neutral oil or even a quick spray, and to avoid oversoaking the rice paper. Work on a damp, smooth surface like a large plate or a silicone mat, and do not let finished rolls touch each other directly. If you are making a big batch, place a piece of parchment or plastic wrap between layers on the serving platter.
Serving Suggestions and Variations
These rolls are light enough to serve as an appetizer but filling enough to be a full lunch if you include rice or noodles inside. I have served them alongside a simple cucumber salad, mango sticky rice, or even a hot bowl of pho for contrast. You can also skip the rolling entirely and turn the beef mixture into lettuce wraps, or toss it with vermicelli noodles and extra herbs for a quick noodle bowl. Leftover filling keeps well in the fridge for up to three days and reheats beautifully in a skillet.
Storage and Make-Ahead Tips
Rice paper rolls are always best fresh, but you can prep components ahead to make assembly faster. Cook the beef mixture and make the dipping sauce up to two days in advance, storing both in airtight containers in the fridge. Prep and store vegetables and herbs separately in damp paper towels inside bags to keep them crisp. Roll the wraps no more than two to three hours before serving, cover them with a damp towel and plastic wrap, and keep them chilled. Let them sit at room temperature for 10 to 15 minutes before serving so the rice paper softens again and is not stiff from the cold.
- Do not freeze assembled rolls; the rice paper will turn gummy and tear when thawed.
- If making a big batch, enlist help; rolling goes much faster with a partner.
- Store leftover dipping sauce in the fridge for up to a week and use it on grilled meats, salads, or fried rice.
 Save to Pinterest
 These rolls have a way of making even a quiet Tuesday night feel special, and they are one of the few dishes that taste better when you eat them with your hands, dipping and savoring each bite. I hope they become a staple in your kitchen the way they have in mine.
Recipe FAQs
- → Can I make these rolls ahead of time?
These rolls are best enjoyed within 2–3 hours of assembly. If storing, cover with a damp towel and plastic wrap to prevent drying. Let them sit at room temperature for 10–15 minutes before serving for the best texture.
- → What can I substitute for Thai basil?
Italian basil combined with fresh mint makes a good substitute if Thai basil isn't available. The mint helps replicate that distinct aromatic, slightly spicy note that Thai basil provides.
- → Are these rolls gluten-free?
They can be made gluten-free by using gluten-free soy sauce or tamari and ensuring your oyster sauce is certified gluten-free. All other ingredients including rice paper wrappers are naturally gluten-free.
- → Can I use a different protein?
Ground turkey or chicken works beautifully as a lighter alternative. For a vegetarian version, you can use crumbled tofu or a plant-based ground meat alternative, adjusting cooking time accordingly.
- → Why is my rice paper tearing?
Make sure your water is warm, not hot, and only soak the wrapper for 3–5 seconds. It continues to soften as you work. If your wrappers are particularly delicate, try assembling on a lightly oiled surface to prevent sticking.
- → Can I omit the rice or noodles?
Absolutely. For a lighter, lower-carb version, simply increase the vegetables and herbs. The rolls will still be satisfying thanks to the hearty beef filling and variety of crisp textures.