 Save to Pinterest
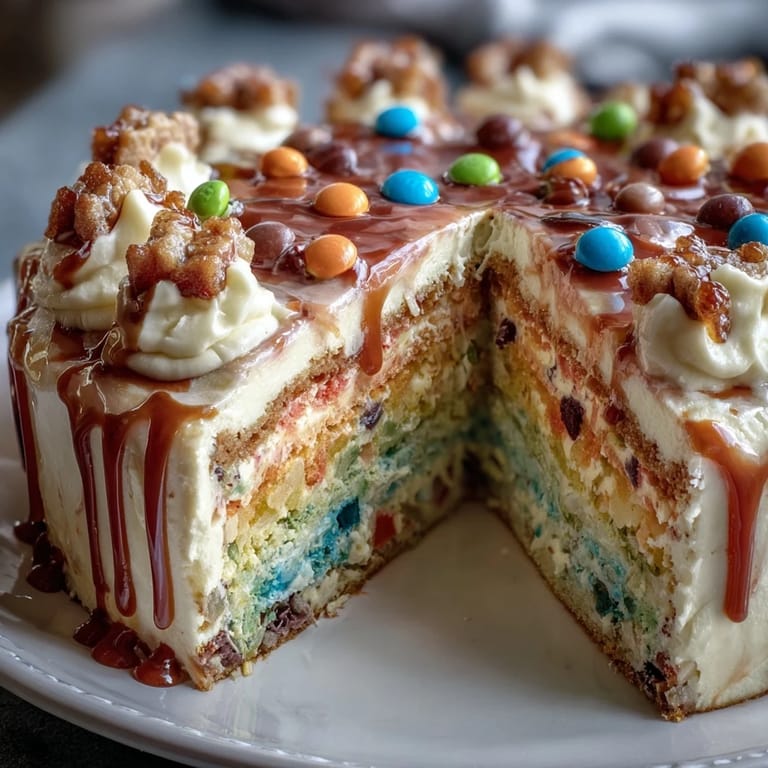
 My neighbor knocked on the door one afternoon with a wild idea: she'd seen a piñata cake online and wanted to attempt it for her daughter's Cinco de Mayo party. I watched her eyes light up describing layers of color hiding a secret candy center, and honestly, I was sold before she finished talking. We spent that Saturday in my kitchen mixing, dividing, and tinting batter until we looked like we'd survived a paint explosion. When that first slice revealed the rainbow tumble of candies inside, even her skeptical teenager gasped. That's when I knew this cake wasn't just dessert—it was a moment.
I made this for my sister's book club meeting, and what started as a simple dessert turned into twenty minutes of everyone gathered around the cake as I sliced. One woman actually took a photo of her slice before eating it, and suddenly half the group was asking for the recipe. That's the magic of a cake with a secret—it transforms a casual gathering into an event worth talking about.
Ingredients
- All-purpose flour: Three cups creates the structure that holds all those beautiful colors and keeps everything tender; sift it with the baking powder and soda so the cake rises evenly.
- Butter and sugar: Creaming these together for three full minutes is non-negotiable—that's what gives you the light, fluffy crumb that makes people come back for seconds.
- Eggs and milk: Both should be room temperature so they blend smoothly into the batter and create a uniform, beautiful texture.
- Gel food coloring: Use gel, never liquid—liquid will make your batter watery and your colors muddy, and you'll regret it immediately.
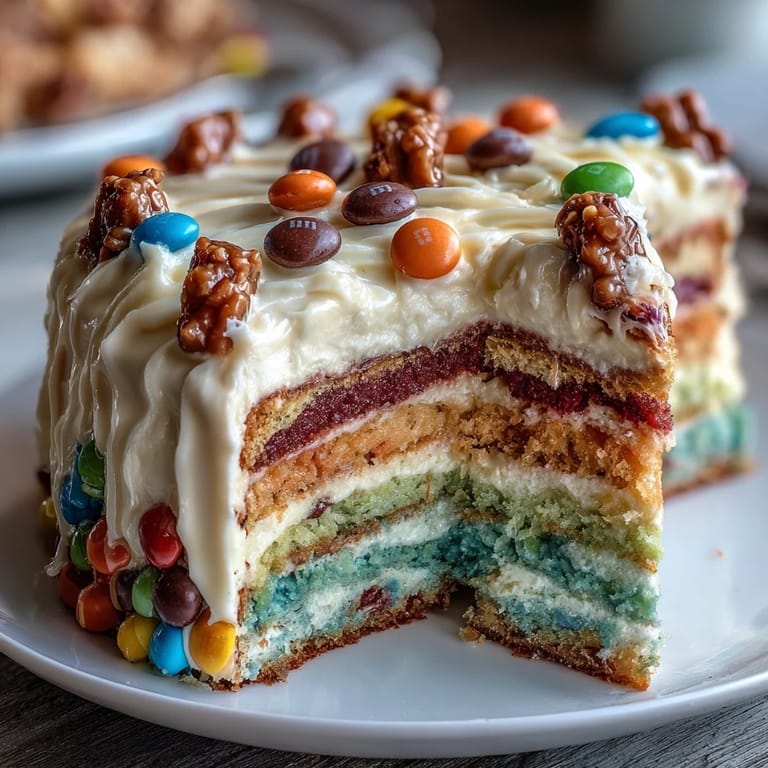
- Assorted small candies: The heart of the surprise; stick with M&Ms, gummy bears, and sprinkles, and skip anything that'll dissolve or stick to the cake layers.
- Butter and powdered sugar for frosting: Softened butter whips into clouds, and sifted powdered sugar prevents lumps that catch between your teeth.
Tired of Takeout? 🥡
Get 10 meals you can make faster than delivery arrives. Seriously.
One email. No spam. Unsubscribe anytime.
Instructions
- Set yourself up for success:
- Preheat your oven to 350°F and grease three 8-inch round pans with actual effort—this is not the time to be lazy with the cooking spray. Line the bottoms with parchment paper so your layers slide out without drama.
- Build your flavor base:
- Whisk flour, baking powder, baking soda, and salt together in a medium bowl; this distributes the leavening agents evenly so your cake rises predictably. Set it aside and don't skip this step even though it seems obvious.
- Cream like your life depends on it:
- Beat softened butter and sugar together for the full three minutes until it looks pale and fluffy, like clouds you could eat. This aeration is what makes the cake tender, so your mixer arm can handle three minutes of work.
- Add eggs with patience:
- Drop in one egg at a time, beating well after each addition so the batter emulsifies properly. If you rush this, you'll end up with a grainy batter that bakes into a dense, disappointing cake.
- Alternate wet and dry ingredients:
- Add the flour mixture in three portions, alternating with milk, and always begin and end with dry ingredients. Mix just until combined each time—overmixing develops gluten and you'll end up with a tough, gummy cake that nobody wants.
- Divide and tint your rainbow:
- Pour the batter into six bowls and add a different gel color to each one: red, orange, yellow, green, blue, and purple. A toothpick or small spoon works better than stirring with a full mixer, which can overdevelop the batter.
- Fill your pans with care:
- Pour each colored batter into a prepared pan, smooth the top gently, and if you only have three pans, bake in two batches. Each layer needs about 15-18 minutes until a toothpick inserted in the center comes out clean.
- Cool with intention:
- Let layers sit in the pans for 10 minutes before turning them out onto wire racks to cool completely. Rushing this step will cause cracks and crumbles.
- Carve your secret cavities:
- Once completely cool, use a 3-inch round cutter to cut a hole through the center of four of the six layers. Press straight down and wiggle gently to avoid tearing the delicate cake.
- Whip your frosting to clouds:
- Beat softened butter until creamy, then gradually add sifted powdered sugar, milk, vanilla, and salt. Beat until smooth and fluffy, about two minutes; this frosting should taste like sweet butter clouds, not grease.
- Stack with intention:
- Place your purple (bottom) whole layer on your serving plate, spread a thin frosting layer, then stack a cut-out layer on top. Continue alternating frosting and cut-out layers, building your rainbow tower.
- Fill the secret:
- Pour your assorted candies into the center cavity created by the stacked cut-out layers, then top everything with the final whole (top) cake layer. The candies should tumble freely inside, creating the surprise moment when you slice.
- Frost like you mean it:
- Generously frost the outside and top of the cake with remaining frosting, then decorate with colored frosting, sprinkles, or festive decorations. A naked cake looks unfinished, so don't hold back.
- Chill before the grand reveal:
- Pop the cake in the refrigerator for 30 minutes before slicing so the layers stay intact and the frosting sets. Cold cake slices cleaner and looks more impressive when you cut into it.
 Save to Pinterest
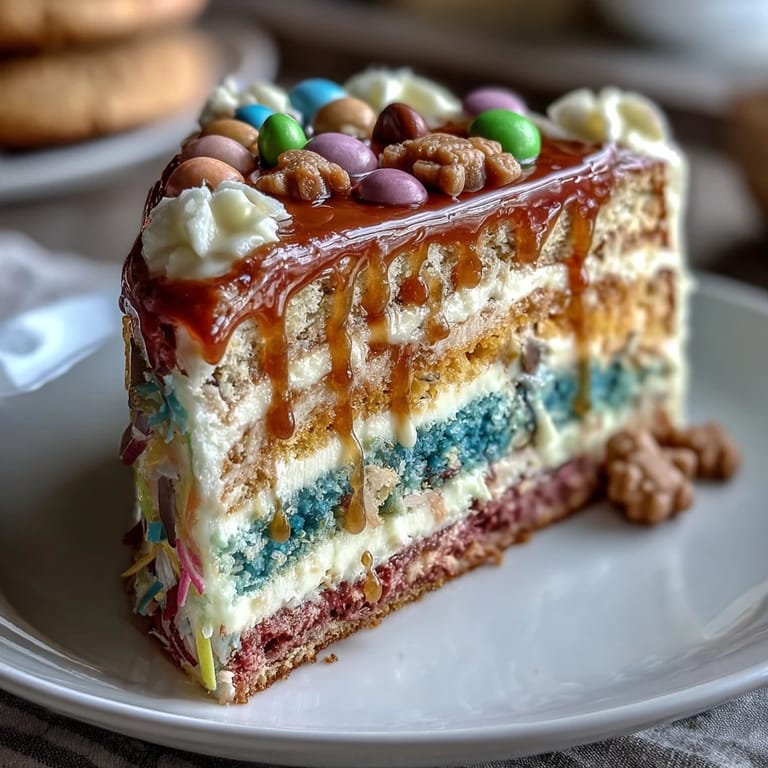
 There's a moment right before you slice this cake where everyone goes quiet, leaning forward with this mixture of curiosity and hope. My nephew asked if the candies would fall out, and I remember his face when they didn't—when that first slice revealed the perfectly suspended rainbow surprise. That's the real reason to make this cake: not for Instagram, but for that genuine look of delight on someone's face when magic actually happens in the kitchen.
Color Selection and Visual Impact
The beauty of this cake lives entirely in the colors you choose, so don't settle for anything less than vivid, jewel-toned gel colorings. I learned this the hard way when I tried mixing my own colors from basic food coloring—they looked dull and muddy compared to the bright, confident colors that gel coloring delivers. Your rainbow should look bold enough that people's eyes light up before they even taste it, so invest in quality gel coloring and don't dilute the colors by adding too much batter to too little coloring.
Timing and Temperature Matter
This cake asks for precision in ways that seem boring until you're the one holding a cake that baked unevenly or didn't rise properly. Room temperature ingredients are not a fussy baker thing—they're a chemistry thing that actually affects how the batter emulsifies and bakes. Oven temperature matters too; I learned this when my first attempt came out with a sunken center because my oven ran five degrees hot and nobody told me.
Assembly, Storage, and Serving Secrets
Assembling this cake feels like architecture, and once you understand how the layers stack to create the cavity, everything clicks into place. The key is working with completely cooled cake so the frosting doesn't melt into the layers, and chilling everything before the final frost and decoration. This cake actually improves in flavor if you make it a day ahead, since the flavors meld and the cake firms up just enough to slice cleanly without crumbling everywhere.
- Chill the assembled cake for at least 30 minutes before slicing so the layers don't shift and the frosting holds clean edges.
- Use a hot, dry knife wiped between each slice to keep your cuts neat and your presentation picture-perfect.
- This cake stays fresh covered at room temperature for two days, or refrigerated for up to four days, so make it ahead if you're hosting and want one less thing to stress about.
 Save to Pinterest
 This cake has taught me that sometimes the most impressive desserts are the ones where effort and play collide perfectly. Every time you make it, you're creating a moment worth remembering.
Recipe FAQs
- → How do I achieve bright, even colored layers?
Use gel food coloring for vibrant hues and divide batter evenly. Bake layers in separate pans to prevent colors from blending.
- → What candies work best for the filling?
Small, assorted candies like mini M&Ms, sprinkles, and gummy bears create a fun surprise without heavy weight or stickiness.
- → Can this be made gluten-free?
Yes, substitute regular flour with a 1:1 gluten-free flour blend to maintain texture and structure.
- → How should I prepare the layers before stacking?
Cool layers completely, then use a round cutter to carve out cavities in four layers for the candy filling.
- → What’s the best way to decorate the cake?
Frost with a creamy buttercream tinted with colors or topped with festive sprinkles to complement the rainbow layers inside.